1. Log on to your computer as an administrator. Click Start, and then click Control Panel.
2. Click Performance and Maintenance.
3. Click Power Options.
4. In the Power Options Properties dialog box, on the Power Schemes tab, click the Power schemes drop-down list and select the power scheme that most closely matches how you use your computer. Different computers have different power management capabilities, so your Power Options Properties dialog box may look slightly different from the one shown here.
5. If available, adjust the System standby and System hibernates settings if you are not happy with the default selection. Standby reduces power usage when your computer is not in use by turning off the parts of your computer that use the most energy. It only takes a few seconds to start a computer from standby. Hibernation saves your programs and shuts your computer down completely. Hibernation uses no power, but it takes a few seconds longer to recover from hibernation when you need to use your computer again. Setting shorter delays before standby and hibernation reduces power usage, but waiting for your computer to start may be inconvenient.
6. On the Advanced tab, you can adjust the default behavior of the power buttons on your computer. If you have a notebook computer, you will also see settings for closing the lid of your computer and pressing the sleep button on your computer. On notebook computers, you can significantly extend the battery life by setting the When I close the lid on my portable computer option to Stand by.
7. On the Hibernate tab, select Enable hibernation if it is not already selected.
** Power managements options, such as System standby and System hibernation, are a compromise between power usage and convenience. If you find it annoying when your computer goes into standby or hibernation, repeat these steps to increase the length of the delay or to disable those features completely.
Saturday, July 26, 2008
Configure Power Management in Windows XP
Thursday, July 24, 2008
Remove Thumb.db File
Thumb.db is is a cache of the current picture in that directory.
You may find this file anywhere in your computer. You may be just get rid of this file. This file is not a virus related file nor it is a scam. Still it looks like a virus related file. Anyway there is no harm in that file but if you still don't want to see this file there is a option for that also.
Following are the steps you have to perform for that ......
1 > open "WINDOWS EXPLORER".
2>go to "TOOLS".
3>open "FOLDER OPTIONS".
4>go to "VIEW".
5>1st section "FILES & FOLDERS".
6>click on the "DO NOT CACHE THUMBNAILS".
now the thumbnail file will be removed from your computer once u do this the file will be never created.
Wednesday, July 23, 2008
Obtain New IP address Quickly
You some time need to obtain the new IP address without restarting the Modem provided by your ISP. This only works to the Connections which provide Dynamic IP Address.
Do the following step for that...
1. Click on "Start" in the bottom left hand corner of screen
2. Click on "Run"
3. Type in "command" and hit ok
You should now be at an MSDOS prompt screen.
4. Type "ipconfig /release" just like that, and hit "enter"
5. Type "exit" and leave the prompt
6. Right-click on "Network Places" or "My Network Places" on your desktop.
7. Click on "properties"
You should now be on a screen with something titled "Local Area Connection", or something close to that, and, if you have a network hooked up, all of your other networks.
8. Right click on "Local Area Connection" and click "properties"
9. Double-click on the "Internet Protocol (TCP/IP)" from the list under the "General" tab
10. Click on "Use the following IP address" under the "General" tab
11. Create an IP address (It doesn't matter what it is. I just type 1 and 2 until i fill the area up).
12. Press "Tab" and it should automatically fill in the "Subnet Mask" section with default numbers.
13. Hit the "Ok" button here
14. Hit the "Ok" button again
You should now be back to the "Local Area Connection" screen.
15. Right-click back on "Local Area Connection" and go to properties again.
16. Go back to the "TCP/IP" settings
17. This time, select "Obtain an IP address automatically"
Hit "Ok"
19. Hit "Ok" again
20. You now have a new IP address
Tuesday, July 22, 2008
Download From Rapidshare without wait
Rapid Share one of the Best File sharing website that allows you to share your files with anyone .As the name suggest "Rapid" its the Rapid way of sharing the files.But If you want multiple file to download from Rapid share then you need a Premium Rapid share account and it costs a lot , So what to do ?
Here are some of the tips about "How to download from rapid share without time limits"
The main idea behind the tricks is that Rapidshare traces the users IP address who downloads anything from there servers and assigns some limits to specific IP adress . To get around this, you need to show the rapidshare server a different IP address.
Here are some methods for doing this:
1.
For the BroadBand users it is very easy to download from Rapid share if they have Dynamic IP.
1.Download the file which you want
2.After completing the first download, make your modem off..
3.Wait for 3-5 sec and restart it.
4.Again follow the normal steps of downloading the file from Rapid share.
2.
Short-Out the JavaScript:
1. Goto the page you want to download
2. Select FREE button
3. In the address bar put the following:
javascript:alert(c=0)
4. Click OK
5. Click OK to the pop-up box
6. Enter the captcha
7. Download Your File
3.
Request a new IP address from your ISP server.
Here's how to do it in windows:
1. Click Start
2. Click run
3. In the run box type cmd.exe and click OK
4. When the command prompt opens type the following. ENTER after each new line.
ipconfig /flushdns
ipconfig /release
ipconfig /renew
exit
5. Erase your cookies in whatever browser you are using.
6. Try the rapidshare download again.
Frequently you will be assigned a new IP address when this happens. Sometime you will, sometimes you will not. If you are on a fixed IP address, this method will not work.
4.
Use a proxy with SwitchProxy and Firefox:
1. Download and install Firefox if you have not already
2. Download and install SwitchProxy
3. Google for free proxies
4. When you hit your download limit, clean your cookies and change your proxy
5.
You can use a bookmarklet to stop your wait times:
1. Open IE
2. Right Click On This Link
3. Select Add to Favorites
4. Select Yes to the warning that the bookmark may be unsafe.
5. Name it "RapidShare No Wait"
6. Click on the Links folder (if you want to display it in your IE toolbar)
7. Click OK
8. You may need to close and reopen IE to see it
9. Goto rapidshare and click the bookmarklet when you are forced to wait
Monday, July 14, 2008
Latest Kaspersky Internet Security
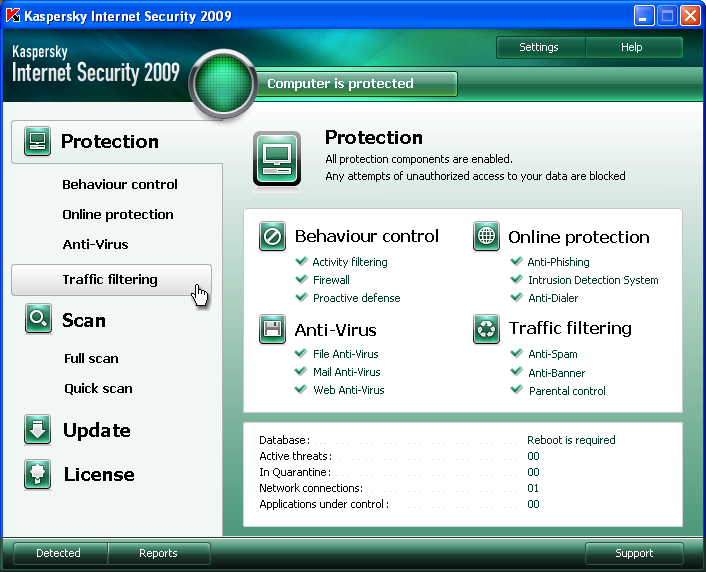
Kaspersky Internet Security 2009
Kaspersky Antivirus is a top of the line program that offers all the protection you will need. With low scan times and high detection rates, as well as an interface that can't be beat.


http://rapidshare.com/files/109972668/k-9.rar
Sunday, July 13, 2008
ESET Smart Security 3.0.669
ESET Smart Security Home Edition 3.0.669
This is the best I found, use it and share the experince.
ESET Smart Security is a tightly integrated solution designed to protect computers from a range of threats. Built on the award-winning ESET NOD32® Antivirus and its powerful ThreatSense® engine, ESET Smart Security provides antispyware, antispam and customized firewall features. Utilizing ThreatSense — the industry's most advanced heuristics — the window of vulnerability between virus outbreak and signature update is reduced.
ESET Smart Security provides:
* Proactive Protection: award winning ThreatSense technology combines multiple layers of detection protecting you from Internet threats before it is too late. The included antispam and personal firewall features provide you with a total security solution.
* Precise Detection: ESET accurately identifies known and unknown threats. It consistently wins top awards from testing labs and is recognized for having zero false positives.
* Lightweight Design: Smart Security requires less memory and CPU power, allowing your computer to run fast, making more room for games, web browsing, and emailing.
* Fast Scanning Speeds: ESET Smart Security is a highly efficient program ensuring fast file scanning and product updates, while running quietly in the background.
ESET Smart Security is a new product designed to provide comprehensive protection against a variety of threats. It features the following:
• The next version of ESET's anti-malware engine with comprehensive protection against adware, rootkits, spyware, Trojan horses, viruses, worms and other types of malicious software
• A personal firewall with port stealthing and advanced filtering features
• An antispam filter with Bayesian filtering, whitelisting and blacklisting.
ESET NOD32 Antivirus + Antispyware
• This component is in fact an improved version of the award-winning scanning engine of NOD32 Antivirus v2.7. With respect to program's unprecedented scanning speed, the following improvements have been made:
• Improved system of cleaning and deleting infiltrations. The antivirus system now intelligently cleans and deletes infiltrations with no need for user interaction.
• Computer scan can be run in background in order to use only a part of system resources. Thus scanning will not affect the
performance of your computer and you will be able to work on it as usual.
• The resident protection supports archive scanning.
• Update optimization, smaller update package size than in version 2.7, more effective management and protection of update files against damage.
• Email protection for users of Outlook Express.
ESET Personal Firewall
• Firewall monitors all traffic between a protected computer and other computers in the local network and in the Internet. High quality protection is provided by the following functions:
• Scanning of application protocols HTTP and POP3 (used for Internet browsing and for retrieving email from servers) for infiltrations.
• Checking low-level network communication which helps to avoid many of various remote attacks.
• Ability to recognize the character of network connections established by various types of infiltrations and ability to automatically terminate them.
• Filtering of incoming and outgoing communication based on user defined rules.
• Monitoring changes in executable files.
• Interactive and automatic mode.
ESET Anti Spam
• ESET Anti Spam serves to filter unsolicited email, which makes your work with email more effective. The key features of the ESET Anti Spam are:
• Support for the RCF email format
• Supports several scanning techniques including the combination of Bayesian filter, virus signatures and user defined rules.
• Supports the creation of Blacklist and Whitelist.
• Integration with the Microsoft Outlook messaging and collaboration client.
• Ability to control multiple messages simultaneously.
Download:
http://rapidshare.com/files/128387382/ESET_Smart
_Security_3.0.669_X32_www.smforum.net.rar.html
